Camtasia to bogaty w funkcje i popularny program do edycji wideo. Ta strona zawiera obszerny przegląd Camtasia pod względem ceny, interfejsu, funkcji i tak dalej.
Recenzja Camtasia
Camtasia to wielofunkcyjne i łatwe do opanowania oprogramowanie do edycji wideo wydane przez firmę TechSmith ze Stanów Zjednoczonych. Może być używany do edycji wideo, edycji audio, dodawania narracji, kluczowych adnotacji, tworzenia menu, nagrywania PPT, nagrywania ekranu komputera, odtwarzania wideo itp.
Ogólnie rzecz biorąc, trudno jest wziąć pod uwagę zarówno bogate funkcje, jak i proste operacje. Ale Camtasia to zrobiła, co zaskoczyło wielu użytkowników. W interfejsie nie ma wielu pasków menu, ale są one bardzo dopracowane, co jest bardzo wygodne, aby znaleźć potrzebne funkcje. Umożliwia wycinanie klipów wideo, dodawanie efektów przejść, powiększanie lokalnych obrazów, ilustracji lub dodawanie efektów obrazu w obrazie i nie tylko. Jednocześnie jego formaty wyjściowe obejmują animacje MP4, AVI, WMV, M4V, CAMV, MOV, RM, GIF i wiele innych popularnych formatów, które można uznać za doskonały program do tworzenia prezentacji wideo.
Więcej najnowszych recenzji :recenzja LumaFusion, recenzja VideoPad, recenzja iMovie
(Ekran miga podczas otwierania programu)
Za i przeciw
Camtasia to świetny punkt wyjścia dla nowych redaktorów. Jest to również świetne oprogramowanie do nagrywania, wyświetlania ekranu i wyświetlania samouczków.
ZALETY
- Przepływ pracy jest prosty i łatwy do rozpoczęcia dla nowicjuszy.
- Specjalna witryna z samouczkami (https://www.techsmith.com/learn/tutorials/camtasia/) jest dostępna dla użytkowników w dowolnym momencie.
- Obsługa łączenia obrazów i klipów wideo w wielu formatach w filmy.
- Następnie proces nagrywania ekranu można wstrzymać i ponownie uruchomić w dowolnym momencie, aby skrócić czas późniejszej edycji.
- Responsywna obsługa klienta poprawia Twoje wrażenia.
- Rozdzielczość do 4K.
Wady
- Jest to stosunkowo drogie i wymaga dodatkowych kosztów aktualizacji oprogramowania.
- Czasami w procesie nagrywania może wystąpić awaria.
- Znak wodny (wersja bezpłatna).
Ceny
Chociaż Camtasia jest płatnym oprogramowaniem, użytkownicy mogą skorzystać z bezpłatnego 30-dniowego okresu próbnego. Daje to mnóstwo czasu na zastanowienie się, czy chcesz wydać na to 299,99 USD.

Cennik Camtasia
Jak uzyskać Camtasię
Wejdź na oficjalną stronę Camtasia, aby pobrać bezpośrednio, aby uniknąć inwazji dołączonego oprogramowania lub oprogramowania antywirusowego.
Link do oficjalnej strony:https://www.techsmith.com/video-editor.html
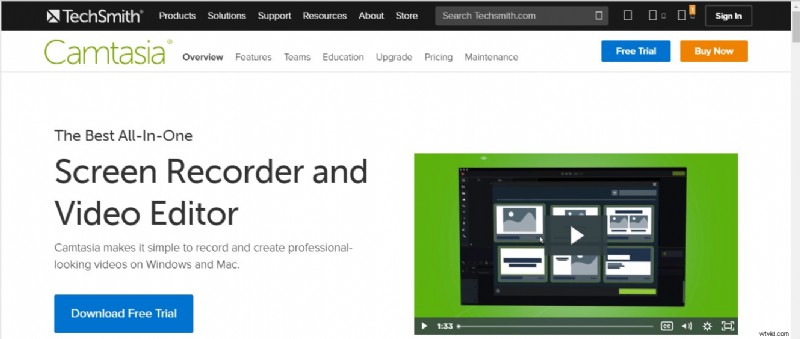
Pobierz Camtasię
Główny interfejs
Po wejściu do głównego interfejsu Camtasia witają Cię cztery duże podzielone na partycje panele:pasek narzędzi, okno podglądu wideo, pasek narzędzi właściwości i panel osi czasu.
Cztery widoki partycji głównego interfejsu.
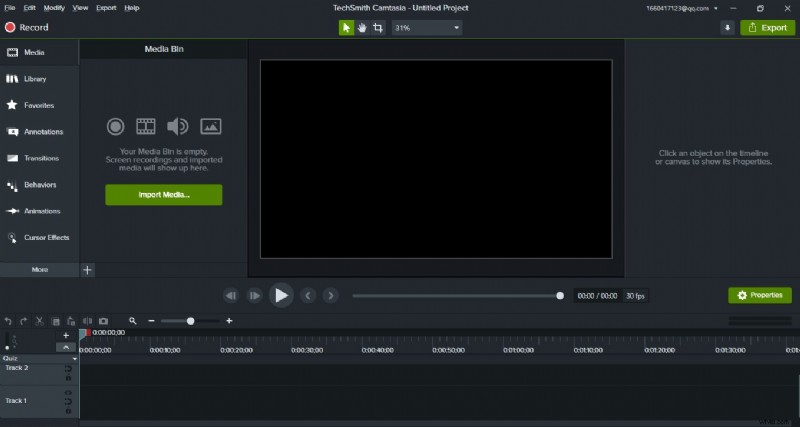
Główny interfejs Camtasia
Pasek narzędzi
Pasek narzędzi jest, jak sama nazwa wskazuje, podsumowaniem wszystkich przycisków funkcyjnych, które są używane w procesie edycji wideo. Widzimy, że ta sekcja jest również podzielona na dwie części. Po lewej stronie znajduje się lista funkcji, a po prawej obszar wyświetlania. Camtasia podzieliła wszystkie funkcje na 13 kategorii:
- Media :Umieść wszystkie zaimportowane materiały, w tym audio, wideo, materiały PPT itp. Możesz zmienić układ materiału, dostosowując małą ikonę w prawym dolnym rogu.
- Biblioteka :Animacja i logo Camtasia są wygodne do uzyskania dla użytkowników.
- Ulubione :zbieraj adnotacje lub efekty, klikając ikonę gwiazdki.
- Adnotacje :Dodaj adnotacje i identyfikację kształtu do filmu lub stwórz efekt mozaiki, dostosowując kolor i rozmycie.
- Przejścia :Dodaj efekty przejścia, aby każda klatka była bardziej naturalna.
- Zachowania :Używany głównie do dodawania efektów animacji do tekstu lub wideo.
- Animacje :Dostosuj efekty powiększania, przesuwania, obracania lub pochylania obrazu wideo.
- Efekty kursora :Dodaj kursor do myszy, aby podświetlić śledzenie ruchu myszy.
- Narracja głosowa :Aby nagrać narrację głosową.
- Efekty dźwiękowe :Usuń szum z dźwięku lub dodaj efekty pojawiania się i zanikania.
- Efekty wizualne :dodawaj obramowania, usuwaj kolory i przyspieszaj lub spowalniaj wideo.
- Interaktywność :dodaj quiz, aby zobaczyć, kto ogląda film i jakie robi postępy.
- Napisy :Dodaj napisy do filmu.
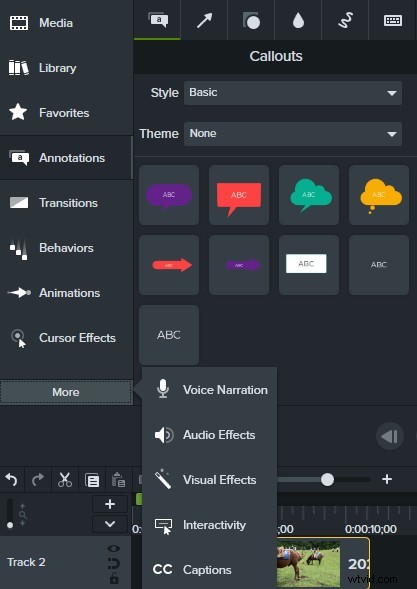
Potężny zestaw narzędzi
Okno podglądu wideo
W oknie podglądu możesz przeglądać nie tylko klipy na osi czasu, ale także różne efekty. Dostępne są cztery główne przyciski:przycisk Edytuj (do przesuwania multimediów, zmiany rozmiaru lub obracania ekranu), przycisk Przesuwanie (lub po prostu przytrzymaj spację, aby przeciągnąć ekran w celu uzyskania lepszego widoku), przycisk Kadruj (lub wystarczy przytrzymać klawisz Alt, aby wyciąć niechciane obszary ekranu), a płótno skaluje się i zmienia rozmiar. Dogodnie pod oknem podglądu Camtasia znajdują się przyciski odtwarzania, pauzy i całkowity czas trwania wideo.
Skalę ekranu można regulować za pomocą kółka myszy.
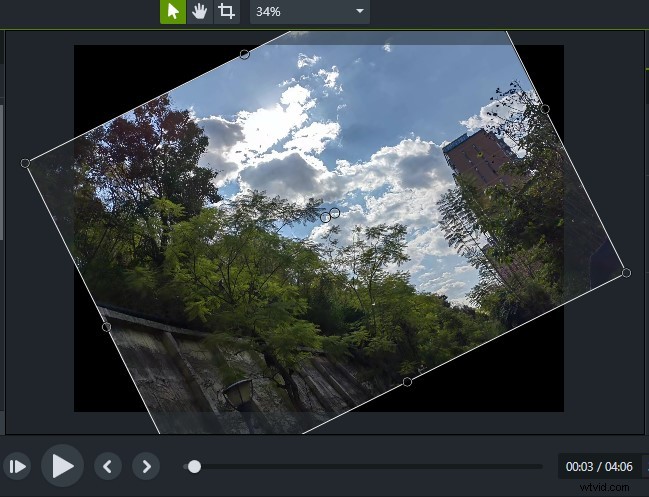
Camtasia Preview Window
Properties Toolbar
On the right-hand side of the main Camtasia screen, there is a prominent little green box – Properties. Here you can not only see the current settings of the selected screen. You can also set and adjust the Scale, Opacity, Rotation, Position, Width, and Height of the target. This column is also very important during the operation. (Hide with two clicks)
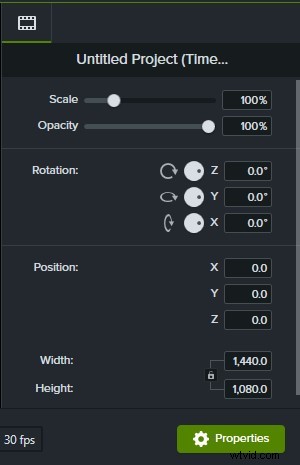
Camtasia Properties
Timeline Panel
There are two main ways to add the timeline in Camtasia. The first one is to drag the material directly from the material library to the timeline. The second is to click “+” on the left side of the timeline panel to add it. At the same time, the arrow buttons in the upper left and right directions have the functions of undo and return respectively, which gives you a chance to try and make mistakes. Here, cutting and segmentation are two functions that are easily confused. When you drag the cursor of the timeline to a picture, if you click Cut, the whole picture will disappear. If you click the split button, that picture will be split into two separate frames. The Copy and Paste buttons are the same as the Copy and Paste function we use every day. It can copy the effect or animation to the clipboard and paste it to the position you need. The active axis next to the magnifying glass icon can zoom in and out the entire timeline, which is used to adjust the time interval gap. This is very necessary when intensive care is needed. Similarly, the vertical movable axis on the left can adjust the height of each time axis. In the timeline, you can hide, lock, and enable the tracks on the timeline.
Use the red and green cursors above the timeline to Mark or add Quiz.

Camtasia Timeline Panel
Screen Recording
Camtasia’s best feature is the screen recording function, which can be regarded as one of the best software on the market at present, and it is in line with industry standards.
Click Record (shortcut Ctrl+R) on the top left of the main interface to directly enter the screen recording field. Then a small black box appears on your screen. Take Camtasia 2021 as an example. After clicking, there will be five parts:Screen, Integrated camera, Conexant SmartAudio HD, System Audio, and a Start button. You can accept the system’s default full-screen recording settings or choose to customize the screen recording range. Click on the drop-down arrow of the screen box and you will see more options. Clicking on Custom Region will allow you to make your screen size selection just like a screenshot. A preset window (16:9) will also be available in the software. If your recorded media will eventually be posted to Instagram or Facebook, Camtasia is kind enough to offer you a choice of platform-compliant options. Whether you turn the camera on or off is up to you. You can choose to turn the camera off when you are presenting a PowerPoint or tutorial and turn it on when you broadcast live. Also, if you only want to record your voice, you can simply turn off the System Audio option. So that some system sounds don’t make the whole video noisy. The microphone’s sound can be adjusted in size depending on the situation, usually with the option to turn the volume to maximum. Some preferences can also be set via Tool. Once all the details have been adjusted you can record directly by clicking the red button (shortcut F9). Camtasia allows you to pause the recording at any time after it has started, a feature that effectively saves some of the subsequent editing time. Click the Stop button (shortcut F10) when the recording is finished. The recorded material will be automatically saved to the Camtasia media pool and timeline. If there are frequent errors or unexpected situations during the recording process, you can delete them by clicking the Delete button and the interface will revert to the previous recording frame settings panel.
After recording with the use of Cursor Effects can highlight an area or clear mouse click position.

Camtasia Screen Recording
Audio Effects
When you import a piece of audio into Camtasia, you will see a green horizontal line on the timeline, which you can pull to adjust the sound level of the entire audio directly. Select Audio Effects in the toolbar to add effects directly to the audio. For example, you can embed a Fade in or Fade out sound effect at the beginning or the end. When you want to highlight the climax, you can add Emphasize sound effects, etc. The most noteworthy is the Noise Removal. Just drag it onto the entire audio and the system will automatically do the noise removal for you. This is very convenient and fast. Although Camtasia’s built-in settings for sound adjustments are limited and not up to the professional standards. But for most users, it can already meet their daily needs.
Slow playing sound can also play a role in setting off the atmosphere.

Camtasia Audio Effects
Interactivity
The interactive function of Camtasia is also very powerful. This is very suitable for teachers and some other online education lecturers. You can set the Quiz in the middle or the end of a course, change the quiz name in Properties, select the quiz type, set questions and answers, and check Display Feedback. Finally, you will find that you can adjust the follow-up of whether you answered correctly or not. If answerers don’t fill out the correct answer, you can set the video to automatically turn to a certain place to review again. And Camtasia allows you to set multiple questions. At the same time, viewers can also get happiness from multiple-choice, fill in the blank, short answers, and true/false.
This feature can be effective in keeping you focused during the viewing process.
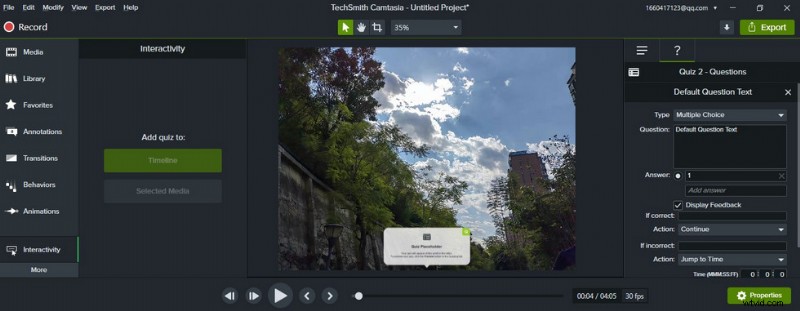
Camtasia Interactivity
Animations
The Animations feature in Camtasia can be used to enhance the viewing experience by zooming in, zooming out, rotating, and other effects to emphasize a screen, video, or commentary. Camtasia has 10 built-in Animations effects, which are similar to a camera lens zooming in for a close-up effect. The principle of each effect is similar except for Full Opacity and No Opacity, which are transparency adjustments. Select an effect and drag it to the clip-on top of the timeline. At this point, an arrow icon will appear on the timeline, which means it was successfully added. Click Zoom-n-Pan in the function bar to select the range where you want to generate the effect. If you want to revert to the original scale in subsequent playback, just click Scale to fit. You can change the time of the zoomed-in and zoomed-out effects by directly elongating or shortening the arrows on the timeline.
Partial zoom animation show effect.
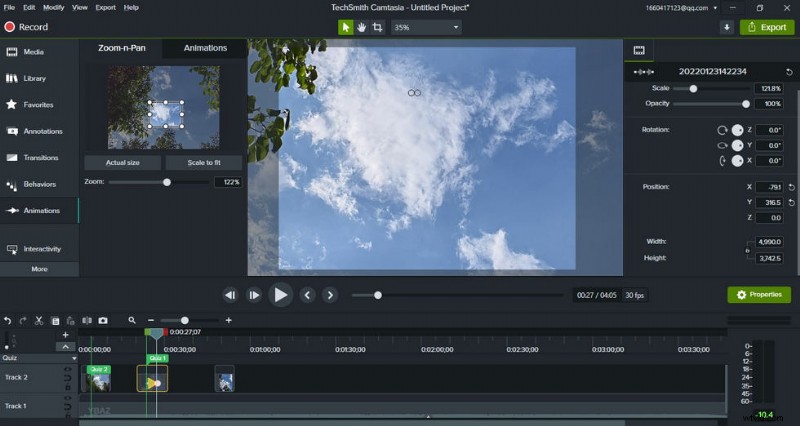
Camtasia Animations
Export
Once you’ve finished your clip and made sure it’s error-free, you can then export your entire work. Click directly on the Export option at the top and you’ll find that Camtasia gives you a variety of options for exporting and sharing:Local File, Screencast.com, Knowmia, TechSmith Video Review, Vimeo, YouTube, and Google Drive. You can also export a clip or audio separately.
The exported video formats are mainly MP4, WMV, AVI, GIF, M4A, WAV (Windows); or MP4, MOV, GIF, M4A, WAV (Mac). You can set the video size, frame rate, encoding mode, color mode, and other related specific parameters independently. Preview available before export.
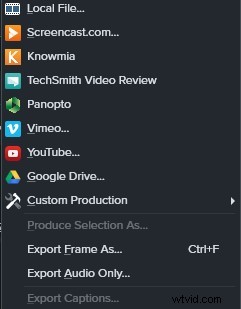
Camtasia Export
Wsparcie urządzenia
Camtasia can run on both Windows and Mac.
Notes:
Windows 7 and below no longer support Camtasia 9.0 and above.
Windows 7/Windows XP please download version 3.0.
Is Camtasia Worth Purchasing?
All in all, Camtasia is a piece of very user-friendly video editing software. Its simple interface and rich training resources make your editing journey enjoyable and easy. Therefore, it is perfect for newcomers to the world of video editing. Camtasia can help you create training videos, explainer videos, live game recordings, video conference recordings, and more. This powerful feature is worth pursuing even for professionals.
Camtasia is designed to promote “Everyone can make a great looking video” to encourage all users to give it a try. 30 days trial period is set up to allow you to fully understand and experience Camtasia before deciding whether you want to purchase the Subscription.
Więcej powiązanych artykułów
- 10 najlepszych konwerterów MP4 na MP3
- Najlepsze alternatywy dla Windows Movie Maker
- 3 najlepsze aplikacje do konwersji YouTube na MP3 na iPhone'a
- 10 zalecanych programów Chroma Key
- 12 najlepszych programów do edycji wideo dla YouTube
